


By Jake Westlake ~ In one on one combat there are a variety of ways to ensure victory. Whether it be by striking your opponent, or by wrestling him to the ground, neither is as satisfying as slapping him into a killer armlock making him scream for mercy while you stand over him in total control. Neutralizing your attackers’ entire body with a devastating armlock is an effective means of self-defense, and is an essential skill for any martial artists’ arsenal.
You may think that you have to be a master martial artist to have the skills necessary to apply dominating armlocks on the street, but this isn’t the case. In the Canadian martial art, Seicho Jutsu, Grandmaster Daniel Verkerke has developed an effective, yet simple, method to teach students armlocks and other controlling techniques. In fact the GMs curriculum holds a comprehensive collection of armlocks.
Grand Master Verkerke has taught his principles for applying armlocks (and other techniques) to martial artist world-wide. He has conducted seminars all over North America, Europe, and even Asia. His unique teaching style is so effective that in the United States, the Pittsburg Sheriffs Department has adopted his system as their own. Putting it to the test in the streets of “Steel Town” every day.
PRINCIPLE 1
Understanding Armlock Mechanics
Before you start applying armlocks you have to understand the mechanics of the arm. You have to know how a human arm works and does not work. This will give you the ability to recognize when a armlock presents its self, and the knowledge to apply the technique properly. Ultimately you want to learn how to use your attackers arm as a tool to control their entire body.
Armlocks can be divided into three major categories; Straight arm, bent arm and torsion locks. Straight arm controls the arm at the elbow, bent arm works by torqing the shoulder and the third is effective because of the strain applied to the forearm.
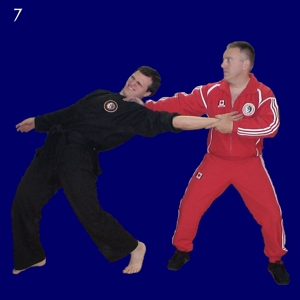
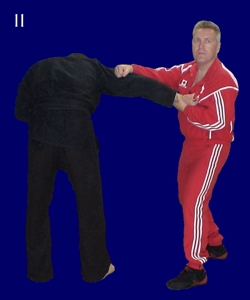
Straight Armlocks
As we all know the elbow is the joint that always the forearm to move through its full range of motion. However no point through that range of motion matters when applying straight armlocks, as long as the arm is fully extended, as when your attacker is throwing a punch or pushing you away. When this happens you can apply a straight armlock by pressing straight through the elbow, while simultaneously pulling the forearm (preferably at the wrist) in the opposite direction. This action moves the arm outside of its normal range of motion, locking it in the fully extended position. From this point you can take total control of your opponent, or if the situation requires, you can dislocate their elbow. It is important to note that although you usually control your attackers wrist with your hands, what you use to apply the pressure to the elbow is only limited by your creativity. The pressure can be applied by your hands, elbow, hips, armpits, knees, or any thing else you can move in the opposite direction of your opponents wrist. As long as the pressure is moving though the elbow the lock should be effective.
There are four basic straight armlocks:


Bent Armlocks
The shoulder is a rotational joint. This means that it can move freely in any direction that you want it to. As long as it is in its normal range of motion it works efficiently and pain free. However when you move it beyond its normal range of motion, pain and discomfort results. This is what you are trying to do when you apply bent armlocks.
Bent armlocks are work when an opponent doesn’t let you straighten his arm. This happens all the time in short range combat, or in grappling matches when your opponent is pulling you towards him, or is trying to avoid being put into a straight armlock. Bent armlocks work by using your assailants forearm and elbow as a lever to crank their shoulder (clockwise or counterclockwise) well beyond its normal range of motion. Not only does this cause an incredible amount of pain, it causes them to bend their torso in an effort to relieve that pain. This allows you complete control over your attacker, with the option of holding them, or if need be, ripping their shoulder from its socket. With bent armlocks there are two basic types; bent over the shoulder, and under the shoulder.
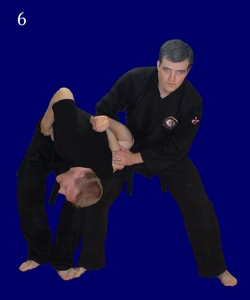
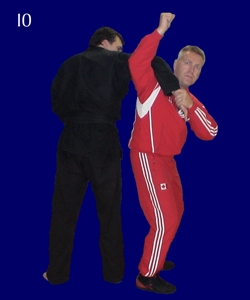
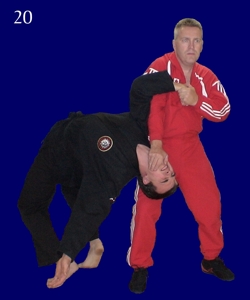
Over the Shoulder
When applying this technique it is best to work with an opposing arm that is bent at a 90 degree angle. This provides you with the most leverage possible, ensuring successful application of the technique.
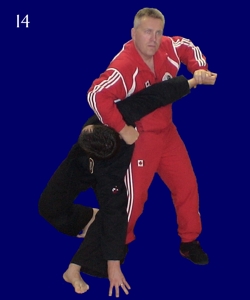
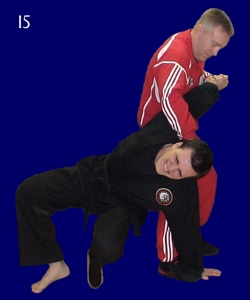
The goal with these locks is to simply move your attackers’ wrist over their shoulder and behind their head while raising the elbow. This bends their torso backwards as they try to alleviate the pain you are imposing on their shoulder, giving you control of their entire body. From this point you can bring them to the ground, neutralizing their attack by kneeling on their head while pulling up on their arm.

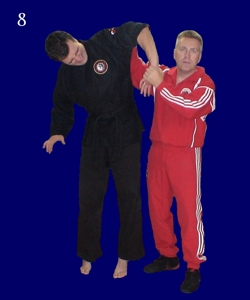
Under the Shoulder
Applying this lock is as simple as moving your aggressors’ wrist under their armpit and putting it behind their back. You see police use this technique all the time when handcuffing people.
The angle of the arm is not as important with this lock as it is when you put the arm over the shoulder. You do have to ensure it is tight enough to bend your opponent forward at the hips. Again this gives you a superior position over your attacker. At this point your only worry is where to plant the opponents face.
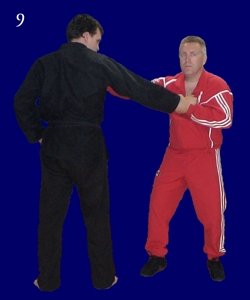
Torsion Locks
These rather unassuming armlocks can add a great deal of pain to your opponents forearm. The extremely unpleasant sensation is caused by twisting your adversaries forearm well beyond its comfortable range of motion. You bring it to the point where the radius and ulna (the two bones in your forearm.) compress and begin to pinch nerves and strain muscle. This will cause your opponent to bend his torso forwards or backwards (The direction depends on which way their forearm is being twisted.) in an effort to relieve the pain. Once again giving you control of their body.
The cool thing about torsion locks are, they can be applied on their own or in conjunction with bent or straight armlocks.
PRINCIPLE 2
Patience
Verkerke always teaches, “You don’t put your opponent into an armlock. They put themselves into one.” It is very easy to put someone into an armlock when they let you. But let’s face it, no one is going to sit back and let you bust their elbow, or torque their shoulder into submission. You have to be able to work with your opponents resistance and wait to apply the technique as it presents itself.
PRINCIPLE 3
Working with Resistance
Believe it or not, your opponent WILL straighten or bend their arm for you! When applying your technique they will try to push out of a bent armlock, or pull out of a straight one. This is your opportunity to slap a deeper meaner and more appropriate armlock on your attacker before they know what hit them. This is done by using your opponents resistance. If they are fighting to avoid a straight armlock don’t fight it. They are literally begging you to put them into a bent one, and vice versa.
PRINCIPLE 4
Control Their Center of Gravity
If you control you opponents’ center of gravity, you control their ability to fight back. When you eliminate their ability to fight back, they will be unable to escape your armlock. This ensures domination. Its as simple as that.
You control you opponents’ center of gravity by moving their body weight into their center of gravity. This makesthem entirely dependant on you for balance. At no point in time do you want to lean on your attacker. This gives him control over his own balance, and the ability to fight you. If this happens they can apply a counter technique. You have to be aware of your attackers ability to defend themselves, and take those opportunities away. By taking control of their center of gravity you can easily do this!

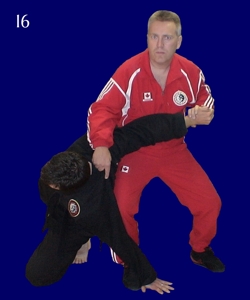
Pictorial Demonstration and Explanation#2
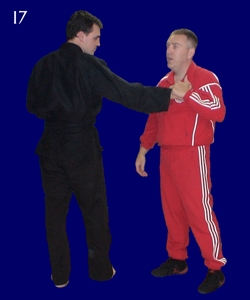
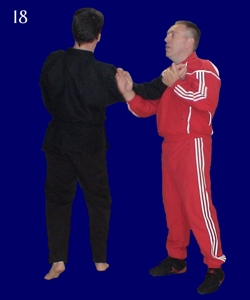
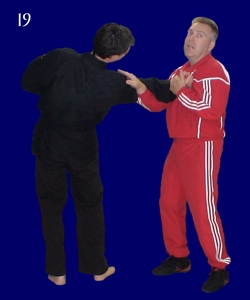
Remember, when applied properly, a brutal armlock can be the fastest way to end a fight and totally dominate your opponent. These techniques are basic guidelines for applying armlocks. There is no limit to the number of ways to apply these armlocks. Once you understand how the arm works and doesn’t work, your only limitation is your imagination. Use your creativity and find more ways to apply these armlocks.
Contributed by Grand Master Daniel Verkerke and Written By Jake Westlake


